A quick guide to uploading content and sharing it with selected workspaces.
Before you start:
-
Have the file you want to upload ready on your computer.
-
Decide which workspace(s) should have access to the content.
-
Choose a clear, user-friendly content name to make it clear to your users what they will be sharing with their client.
Step 1: Open the Content Library
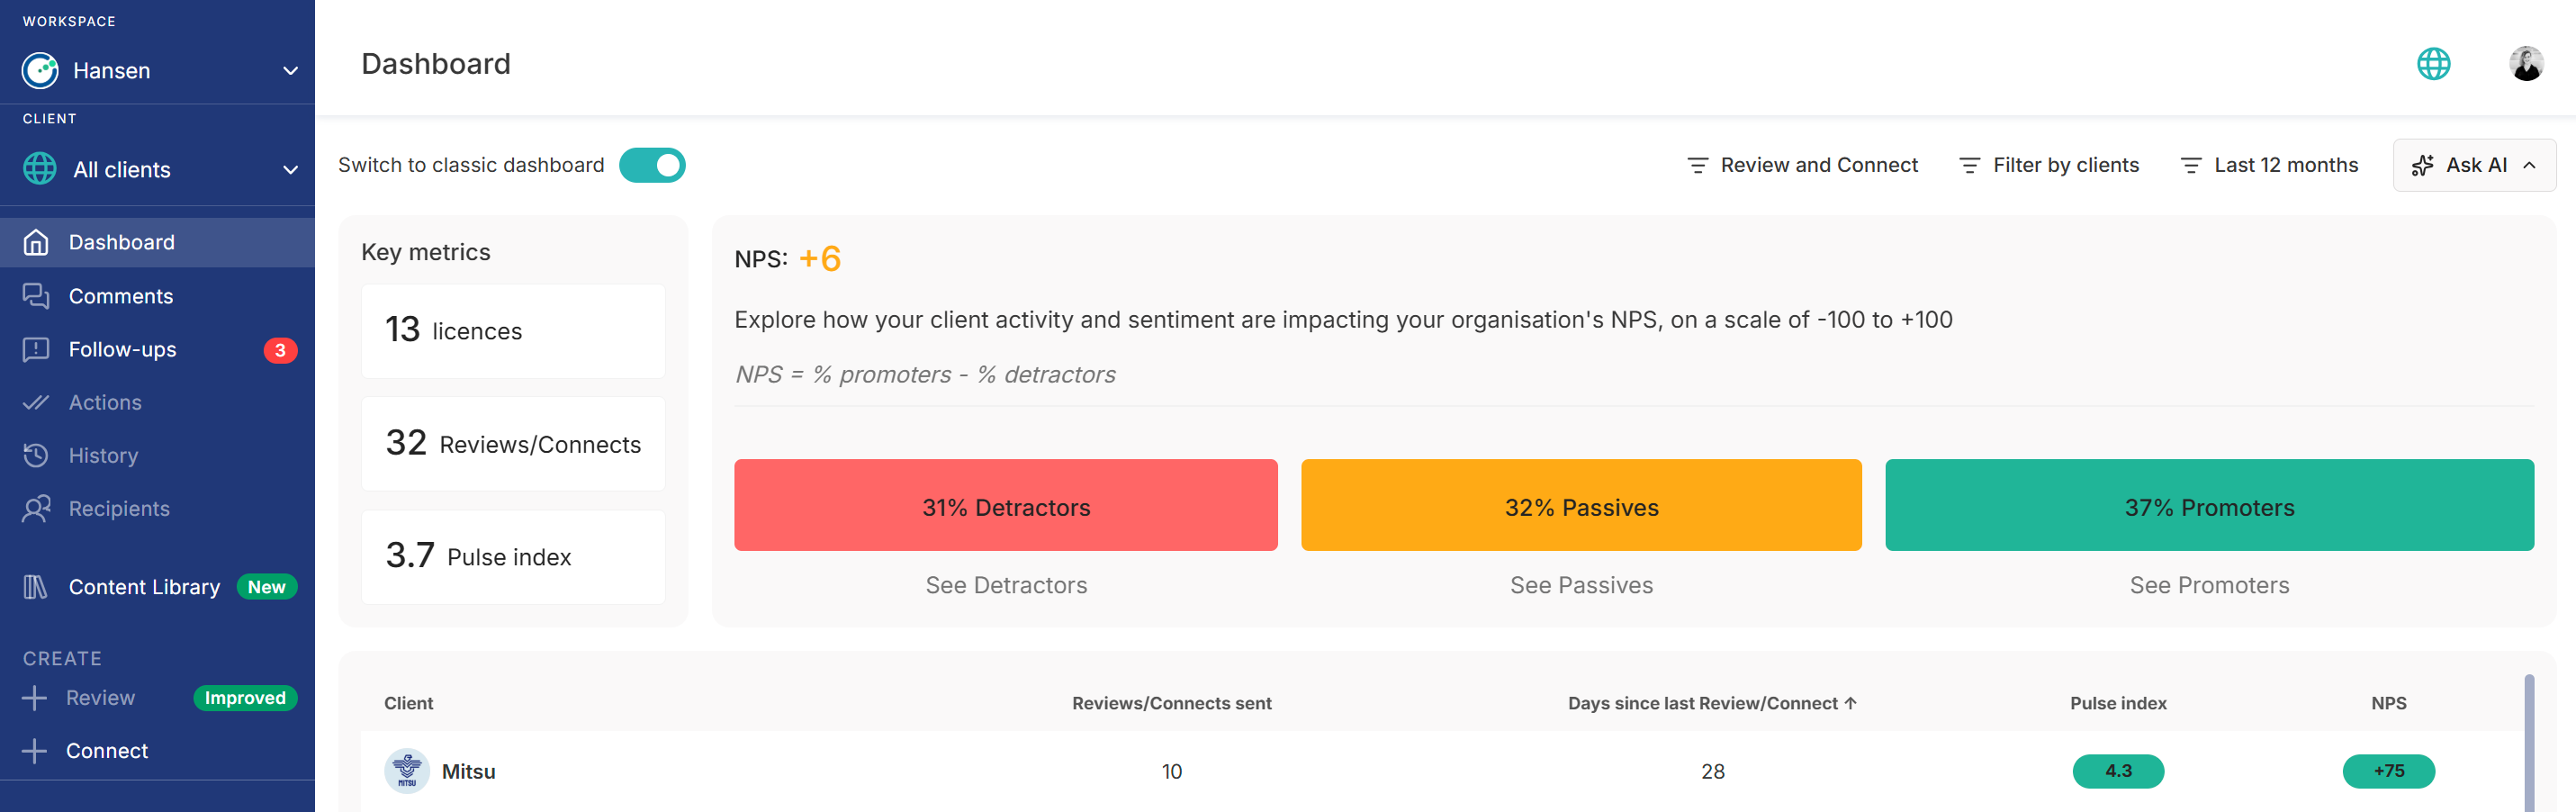
From the Dashboard, select Content Library from the left-hand navigation menu.
Step 2: Select 'Add content'
On the Content Library page, select 'Add content' at the top of the screen. This opens the two-step upload process.
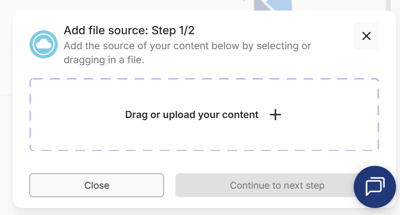
Step 3a: Add your file
- Select or drag the file you want to add into the upload area.
- Check that the correct file has been selected. The selected file is shown in the panel.
- Select Continue to next step.
If you select the wrong file, you can select or drag another file to replace it.
Step 3b: Add content details
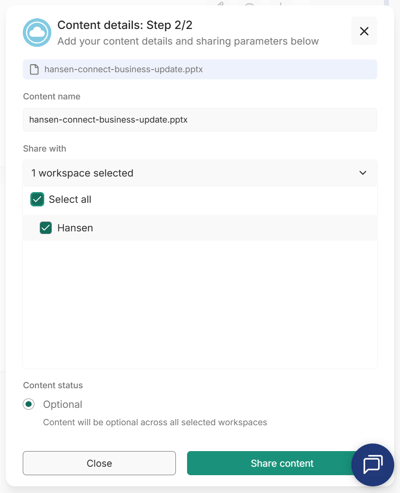
- Content name — Review the suggested name and edit it if required.
- Share with — Open the workspace selector and choose the workspace(s) that should receive the content. You can select individual workspaces or use 'Select all'.
- Content status — The content is set to 'Optional' as default, meaning it will be optional for users to include in their business review across all selected workspaces. A future release will include a mandatory option too.
- Select 'Share content' to publish the content to the selected workspace(s).
Step 4: Confirm the content has been added
After you select Share content, the Content Library refreshes and the new item appears in the list. The item shows its status, name, uploader and upload date.
Managing content
The action icons shown on each content item allow you to edit the content details, preview the content, and download the content.
Quick checklist
- Open the Content Library.
- Select 'Add content'.
- Upload or drag in the required file.
- Select 'Continue' to next step.
- Check or edit the content name.
- Select the workspace(s) to share with.
- Set the content status.
- Select 'Share content'.
- Check that the new item appears in the Content Library.
Read more: