A quick guide to using content from the Content Library when creating a Business Review.
Before you start:
-
Make sure the required content has already been added to the Content Library and shared with the Workspace you are sending your review from.
-
Decide which client recipients should receive the Business Review.
-
Have any additional files you want to include ready on your computer.
Step 1: Start a new Business Review
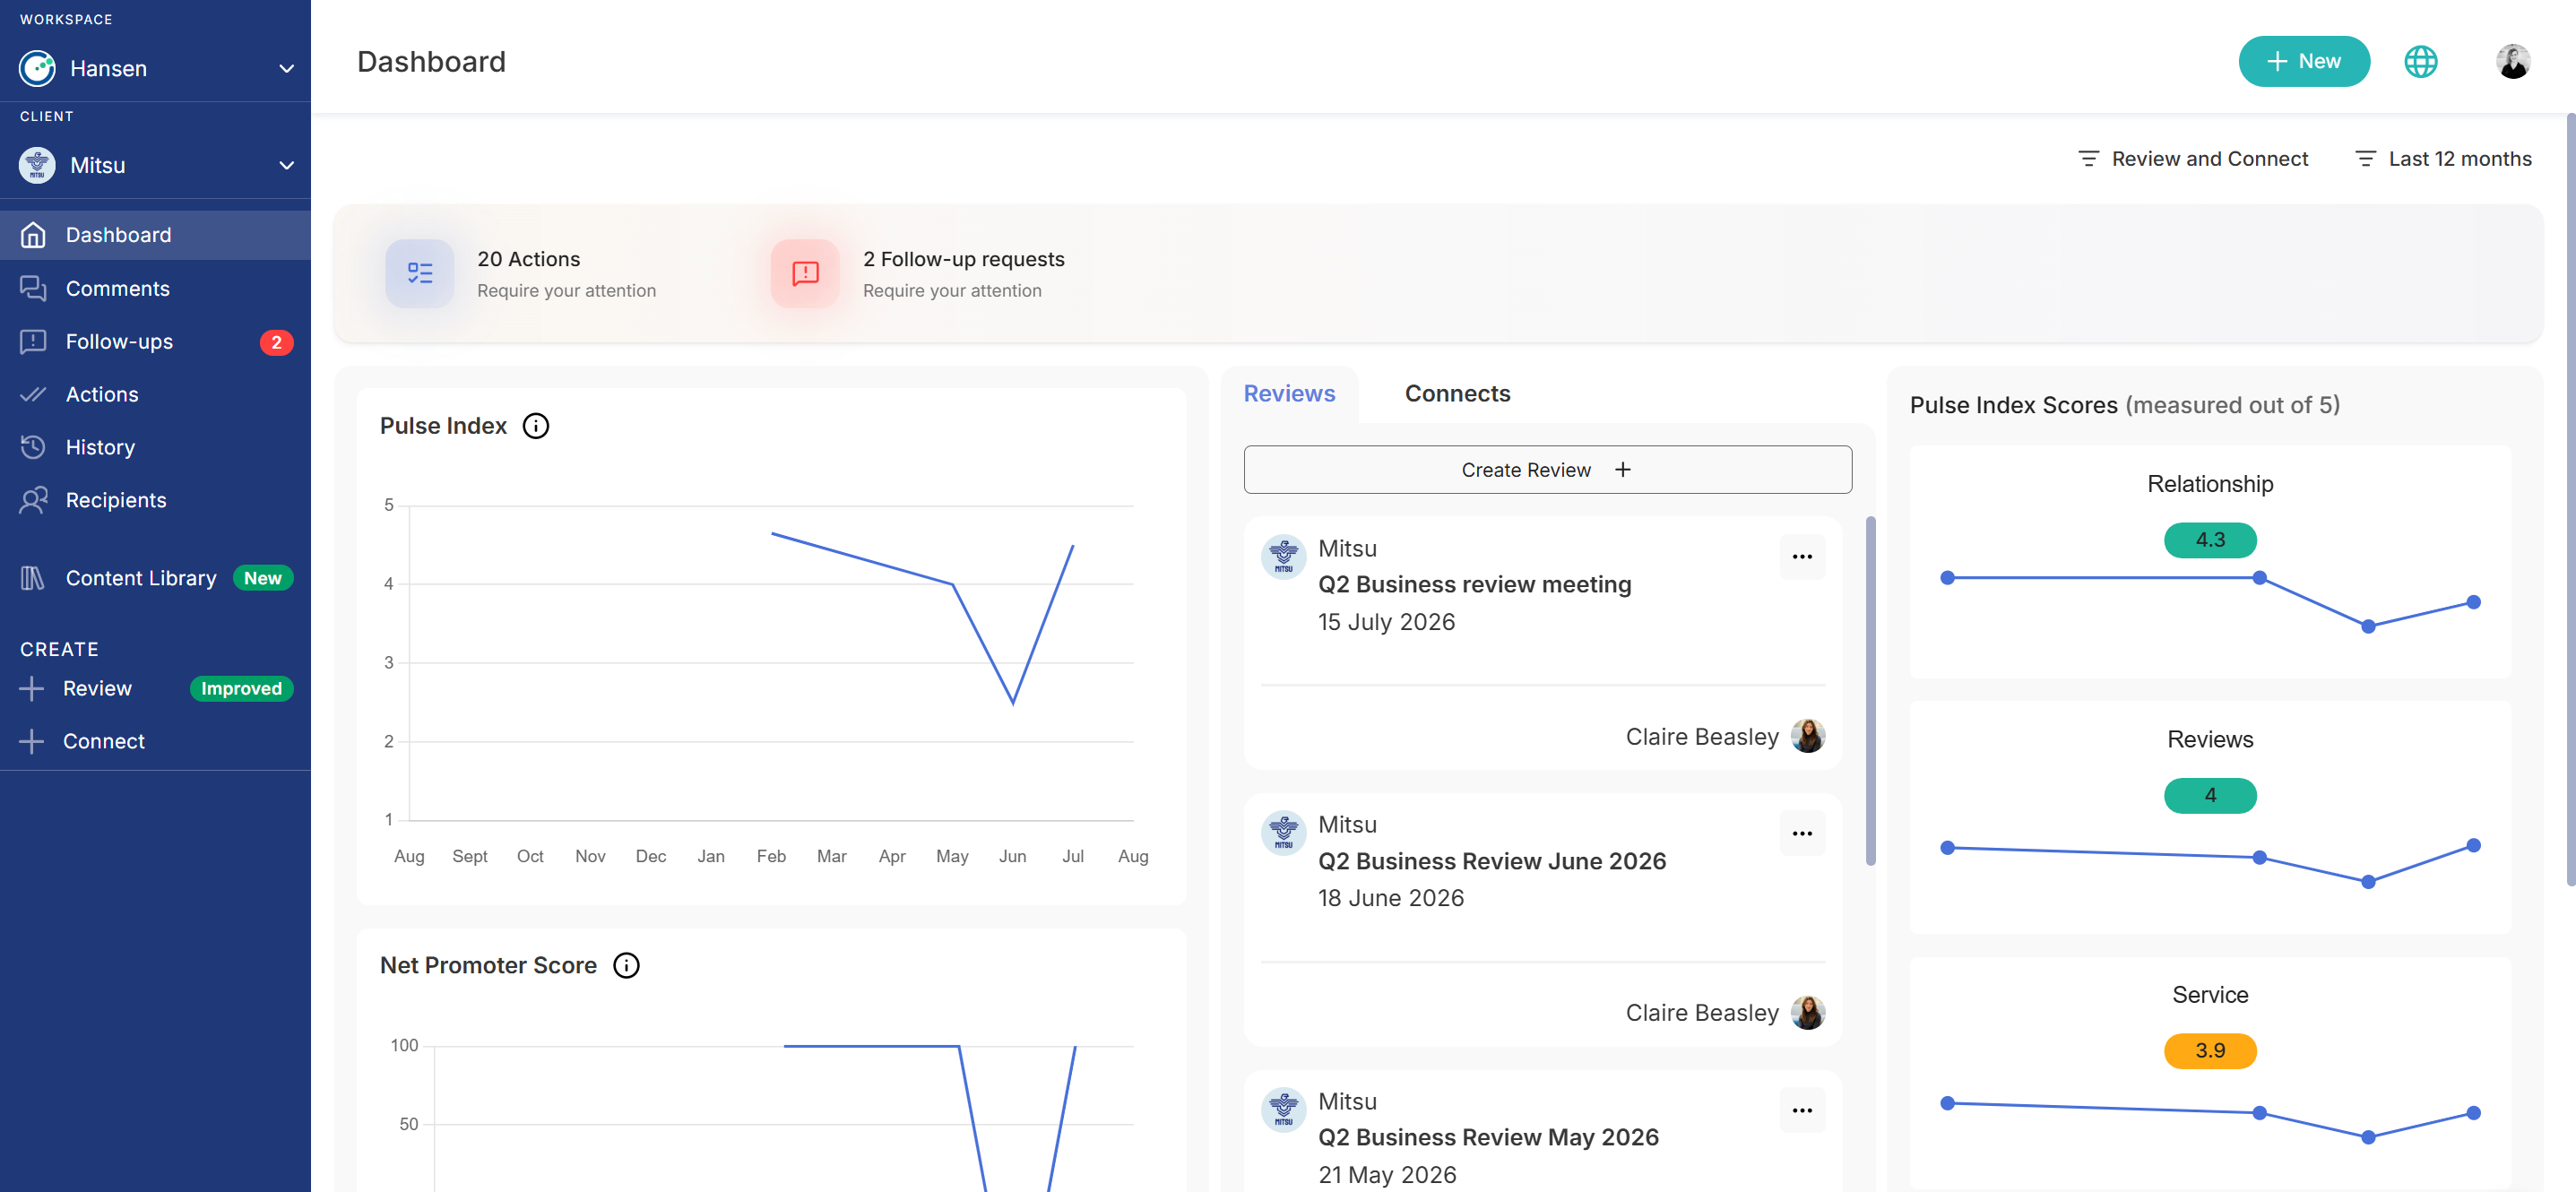
From the Dashboard, select 'Create Review' in the Reviews panel.
Step 2: Start to build your review
Start the review flow as normal by choosing your recipients and creating a cover. For a more detailed breakdown of this step, take a look at our guide to creating and sharing a Clientshare review.
Step 3: Review the pre-loaded content
When you reach 'Add content', any Content Library items shared with the Workspace are already available in the review. They appear in the content list on the left and as preview thumbnail images on the right.
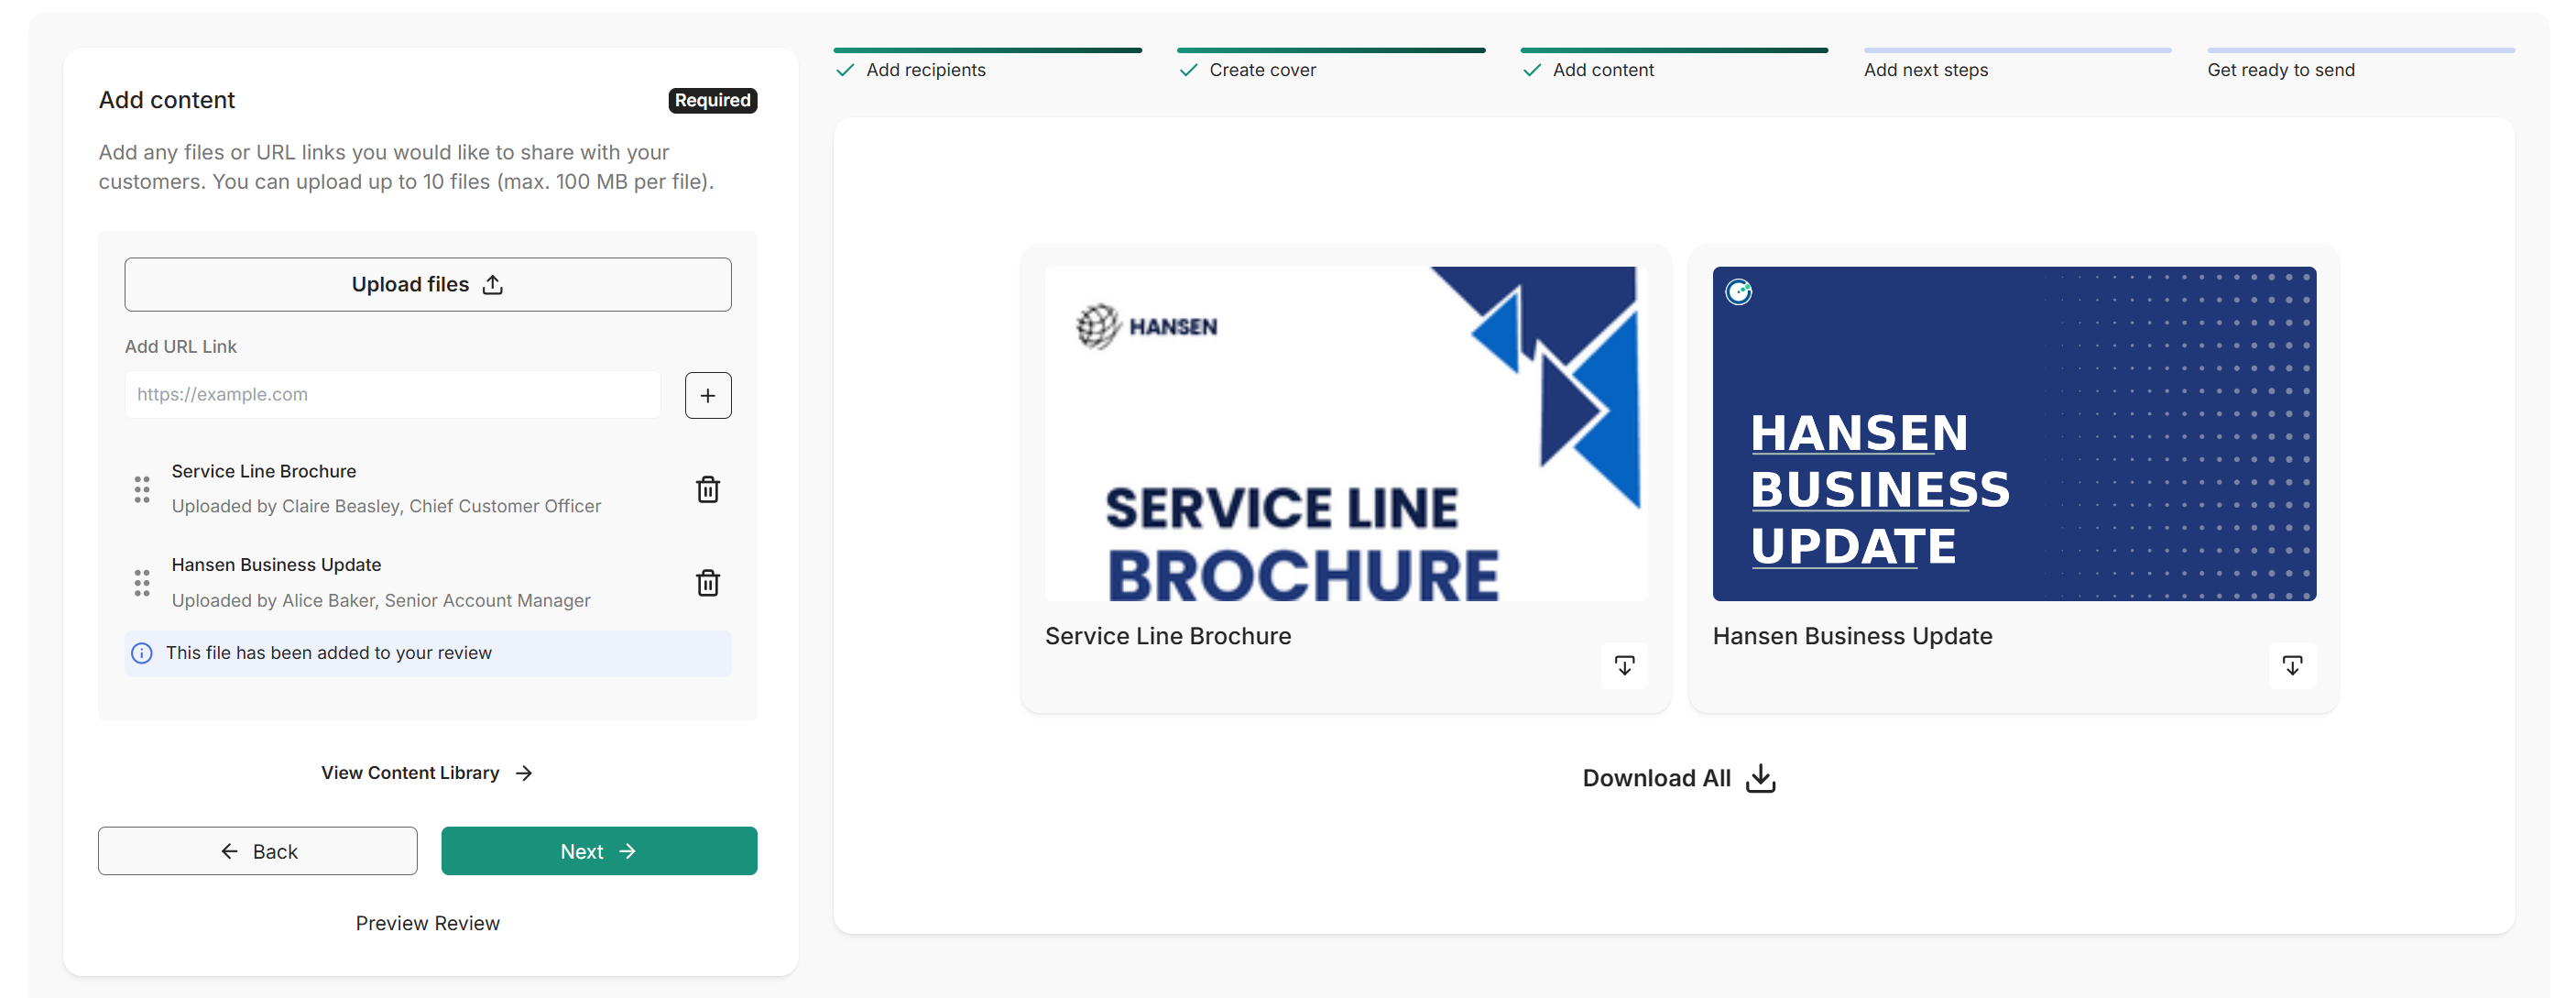
Content added to the library with an 'Optional' status can be removed from this Business Review if it is not relevant. Select the bin icon next to the item you want to remove.
Step 4: Add any additional content
Any additional items will appear alongside the pre-loaded Content Library content.
Step 5: Continue creating your Business Review
Check that the content list contains everything you want to share, then select 'Next' to continue to the remaining Business Review steps.
Quick checklist
- Start a new Business Review from the Dashboard.
- Select the meeting type and recipients.
- Complete the cover and select 'Next'.
- Check the pre-loaded Content Library items on the 'Add content' step.
- Remove any optional items that are not relevant.
- Upload any additional files or add URL links if required.
- Select 'Next' to continue building the Business Review.
Read more: